Showing posts with label old fashioned cooking. Show all posts

Monday, October 1, 2012

Industrial Food: What are they feeding us?

You have heard the old saying "You are what you eat".  The big food companies have to keep their foods stable for a very long time so they add preservatives.  For people like me that have a list of allergies that can not go on one page without making 2 columns that can be a BIG problem.

I have never been able to eat much cheese.  It makes me itch if I eat alot of it.  Now keep in mind I am not allergic to dairy products.  I am however allergic to a multitude of antibiotics and specifically ALL of the "Mycins"... If the name ends in "mycin" then I can not have it.  The same goes with "cillins".  Before I started making my own cheese I bought cheese from the store just like everyone else.  Now that I am making it I can eat it.  Store bought cheese has "Natamycin" added to prevent it from molding.  They all have it.  Here are 2 different brands bought from 2 different stores.  The first is the label from a bag of shredded cheddar from Sam's Club and the second is a block of cheddar from Aldi.


Please note the front label on the bag:
It says "Natural" My natural cheddar has 5 ingredients:
Milk
Annato coloring (natural coloring made from the Annato tree)
Mesophillic starter
Rennet
Salt

Obviously my definition of natural and theirs are worlds apart.

Now here is another point to ponder.  We live in a world of "super bugs" created by the over use of  antibiotics.  One of them is called VRE "Vancomycin resistant enterococcus"  This bug is resistant to all of the "mycins".  Allergies are treated by making us "resistant" to the things we are allergic to.  This is accomplished by giving us very small amounts of the allergen over a period of time.  So my ponder point is this.  Could the resistant strains of super bugs have been created by these small doses of antibiotics in our food?  Mycins in our cheese?  Cillins in our meat?

If you have allergies, I suggest reading carefully the backs of all packages.  Although that is not even fool proof as they are not required to put in everything.  For example many chickens are given Tetramycin in their water.  The chicken consumes the tetramycin then is butchered.  You will not see all of the things that the chicken has consumed prior to slaughter on the package only that it contains a chicken.

The only way to really know what you are eating is to grow, process and produce all of your food.  That is not possible for many city dwellers.  But even the cities have farm land around them.  You can go to the farmers market or get to know a farmer and buy directly from the farm.  You can inquire of their practices regarding what you are buying from them to eat.

Many states have laws that say you can not buy or sell raw dairy products. In Arkansas I can sell 100 gallons a month of goats milk.  I can not however sell the cheese or butter made from it.  And cows milk is right up there with illicit drugs.  The powers that be have put farmers that sell milk in the same classification as a meth dealer!!!  Write to your Governor and complain about those laws.  We should be able to buy what we want to eat and eat whatever we want to.  Our government has become so audacious in its control that it is telling us what we can and can not consume.  I think the worst one was New York saying you can no longer buy a large cup of soda.  Really???  I thought this was supposed to be the "land of the free"  Look at some of the presidential executive orders we are no longer free!  Look at laws on the books regarding food and farmers... Nope, Not free!!!

Sunday, August 19, 2012

Seperating out the cream

My goats give delicious creamy milk, but the cream does not float to the top as easily as does cows cream.  If you dip it off you would only get about 1/2 cup per gallon.  By using a centrifuge type seperator I get about a pint or a little more per gallon of thick wonderful cream.  It makes great butter, whips into stiff peaks and makes creamy ice cream.  I looked at many different kinds before settling on the one that I have.  Now a days most people just go to the store and buy their cream in a nice little carton.  At $5-$7 a quart I think I will pass.  Their butter most times comes in the form of whipped oil with alot of chemicals and artificial flavors... Again I will pass.  Store bought ice cream is a big No No around our house as my stepdaughter is allergic to the emulsifiers they use.  Her face swells up and she looks like a puffer fish.

I looked at many different kinds.  The good ones that are made from metal now cost close to $1000.  The more inexpensive ones are made from plastic.  As if that will last very long.... I finally settled on one that I bought off of eBay.  It was an antique the guy was not sure if it worked because he had never gotten around to using it.  I took a chance and paid $175 for it shipping and all.  I got it here, cleaned up the insides, replaced an O-ring and filled it with oil (Gun oil because I keep that in gallons).  It worked like a charm.  The trick was learning how to time 60 cranks per minute.  Too fast or too slow and your cream does not seperate out right. Too slow causes the cream to be thinner more like half and half and too fast causes it to not get it all.  It has an adjustment inside so that you can adjust for the desired thickness of your cream.

My seperator is a Sears "economy model" sold in their catalog from 1906 to 1942.  Isn't it pretty mounted on my island top?
The milk must be heated to 100 degrees in order to be run thru the seperator.  The seperator has to be warmed up by running hot water thru it first.

First I put the milk into a double boiler system to heat it up to the correct temperature of 100 degrees
Then I pour it into the prewarmed seperator bowl. Begin to crank to get it to the right speed, turn on the flow and then out flows the seperated milk and cream
The white bowl is catching the milk and the red catching the smaller stream of cream.  This time I harvested light cream for making ice cream.  It is set to the consistency of half and half so I can pour it straight into the ice cream maker.

I use the skim milk for making itallian cheese like Mozzarella and Parmasean.

The fun part is cleaning it up.  There are a ton of internal parts to it!!!

Thursday, August 9, 2012

Parmasean cheese


This is the chronicle of my second attempt at parmasean cheese.  The first is hanging in my daughters basement at this time.  We won't know if it turned out right until May so I am keeping my fingers crossed.  To this date I have made: Mozzarella (It turned out awesome as string cheese but did not melt, still working on that issue), cheddar (one try, it is hanging in the basement), parmasean, Ricotta and Chevre (this one is great for cheeseballs).  I always thought making cheese would be "hard".  I would not classify it as hard but instead I would classify it as tedious.  I apologize for forgetting to take pictures of a few of the steps.  It does take special equipment that won't be found in the common kitchen.  The cultures, rennet, etc. can be bought at many cheesemaking outlets.  I like the website www.cheesemaking.com They have lots of step by step pictures and LOTS of recipes.  All of my cheese is made with Goat milk from my girls.  Since Goats milk is high in Lipase naturally I do not add it to the recipe.

First we have to skim the milk, pasrmasean uses skim milk, NOT whole milk.  I save the cream for whipped cream, icecream and butter.  I have an antique cream seperator that works beautifully.  Eventually I will remember to document the process, but for now you warm the milk and then crank it thru.  The cream drizzles out the top spout and the skim milk comes out the bottom.  It is an old sears model that was made sometime between 1902 and 1940.  I cleaned it up and oiled it and works as good as the day it came from the catalog.

First we gather our supplies
A sterilized spoon for stiring, a thermometer abd the package of Thermophillic culture.

 Then we sterilize the pot.  Do this by placing some water in the pot and bringing it to a boil.  Then pour out the water and leave the lid on until you are ready to pour in the milk.

Then we put 2 gallons of our skim milk in a thick bottomed pot.  We heat it to 90 degrees.

Sprinkle the culture on the top, stir it in and then put the lid on and let it sit for about an hour.
Then you get the Rennet out of the fridge
Add the reccomended amount of yours to set up 2 gallons.  Mine is 1/8th of a teaspoon to 1/4 cup cool water.  Then drizzle it into the milk.  Hopefully it is still at about 90 degrees.  Stir it well for about 2 minutes then put on the cover and let it sit again for about 45 minutes.

After 45 minutes test it for a "clean break" To do this insert your clean bare finger into the curd and pull up with your finger tip.  The curd should seperate cleanly and not be mushy.  Also you will see greenish whey around the edges of the pot.

 If it does not break clean then let it sit undisturbed a few more minutes.

When it is set then using a long knife cut into small cubes about 1/4th of an inch.  It is really hard to do the cross wise cuts and I always end up scooping up a handfull and continuing to cut it that way.  We are not suposed to crush the curd squares only cut them.
Once we get them all cut up then we have to "cook the curd" by raising the temperature VERY slowly (2 degrees every 5 minutes) to 100 degrees.  I turn my electric stove all the way down and that is close to right.  Stir it frequently to keep the curds from clumping.  Then contiue to raise the temp to 124 degrees a little faster.  I put my stove on 1 for this step.
When it is to 124 degrees it is done.  The curds should be little and hard.  When you bite one (they have no taste, so it is not "yucky") they squeak on your teeth.

(Sorry here is where I forgot the pictures.)
Pour the whey off without pouring out any curds.  (You can make ricotta from this or the dogs love it)
Then scoop the curds into a cheesecloth lined press.  Press it lightly for 15 minutes then take out the wheel and turn it over (you will have to peel off the cheesecloth and replace it so that the cloth is now over what was the top.  Put it back into the press with a little more pressure for 30 minutes.  Then repeat the process of turning it over.  Do this agian increasing the pressure each time and this time let it sit for about 2 hours.  The last time you put the press at about 20lbs of pressure and let it sit for 12 hours. 
When it is done then take out your wheel and peel off the cheesecloth. 

Make a "saturated" salt brine.  In otherwords more salt than the water can absorb.  About 3 cups of Non-iodized salt to 2 quarts of water.
Put your wheel into the brine and let it float for 24 hours

After the 24 hours is over take out, pat it dry and mark the date on it.  I used a crayola washable nontoxic marker.
Let it sit in a cool dark place for 10 months, like a basement.  You will have to turn it over every few days if it is on a shelf.  My daughter made a net to hang it so that it gets air all the way around.

So in May I will see if it turns out good

Monday, July 2, 2012

Stewed tomatoes

Stewed tomatoes are so yummy.  They go in everything from meatloaf to stews or even just as a side dish.  Canning them has a few more steps than just regular canned tomatoes.

I do not measure but this is close:
For every 4 pounds of peeled sliced tomatoes you will need 1/4lb celery, bell peppers and onions

Wash your tomatoes.  Choose fruit that is firm and with no blemishes or small enough ones they can be easily trimmed.  Save the mushy or ones with large blemishes for making sauce.


Begin by peeling your tomatoes.  To do this bring a pot of water to boiling.  Drop the tomatoes in the boiling water and time for 3 minutes.  Then remove the tomatoes and place in a sink of ice water.  Then you can cut out the core and the peel will slide right off.

Chop your onions, peppers and celery.  I like to make my chunks pretty big.  Put this in a pot.  Then add your sliced peeled tomatoes.
 Bring the mixture on the stove to a boil and then remove from the heat.

Using a slotted spoon fill your jars leaving about 1/2 inch of headspace (sorry forgot to take a picture.) add salt 1/2 teaspoon for pints or 1 teaspoon for quarts

Then place lids and rings on and then process in a PRESSURE CANNER at 10 lbs for 20 minutes for pints and 30 minutes for quarts.  DO NOT USE A WATER BATH.  It is important to drain the tomatoes with your spoon as much as possible and pack them tightly.  They will shrink during canning and you will end up with some water in the bottom of the jar.  The trick is to have the least amount as possible.

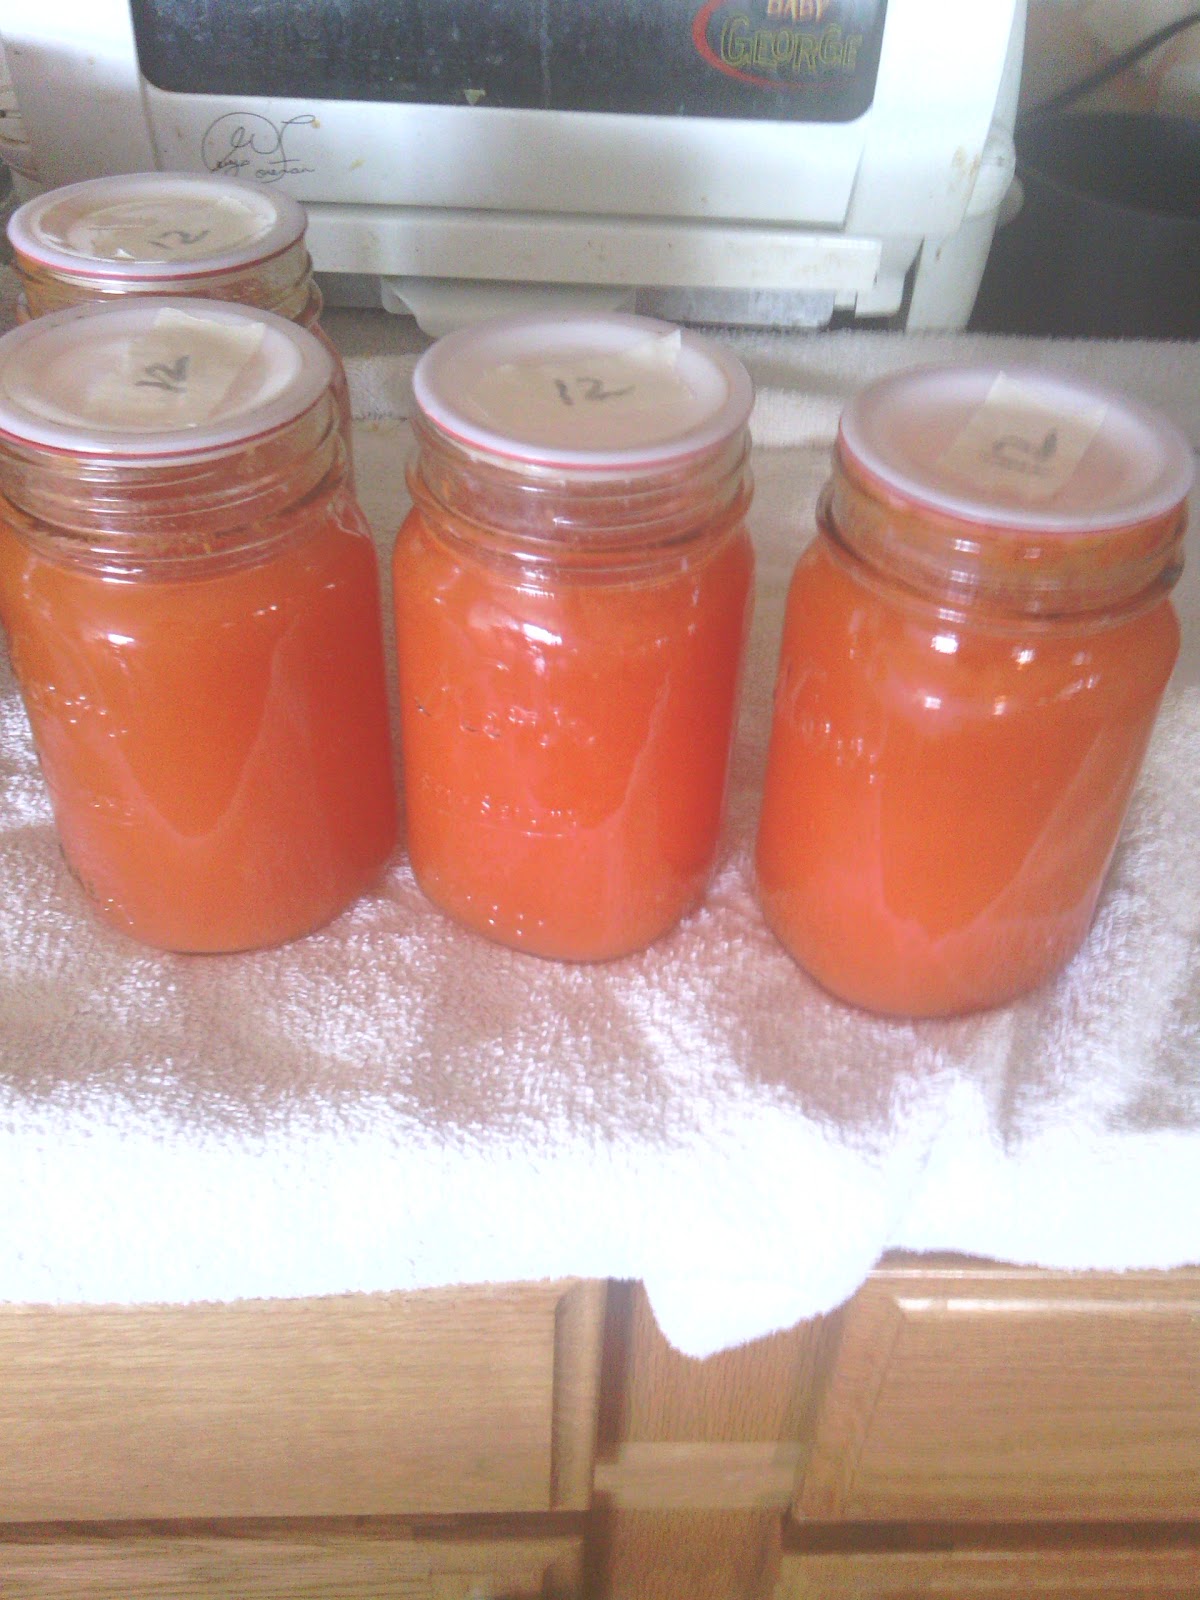
Save the juice left in the pot for tomato juice.  You can run it thru a food sieve to remove the seeds.  Cook down a little more if you want it thicker.  This works great for a soup base or even just for drinking.  Add salt, pepper or seasonings to taste.  Remember they will get stronger from the canning process.  Then process it for the same amount of time/pressure as above.
Your juice may seperate with water at the bottom of the jar.  It is okay just shake it up...

Thursday, June 21, 2012

Corn... Corn... Canning it

It has been a while as my family has been busy with Church camps, fences, etc....  I got 2 bushels of corn to put up and so we canned half of it.  The rest went into the freezer for corn on the cob....

Canned Corn

I forgot to take pictures of the shucking and cutting process.

So first shuck your corn and remove the silk.

Then for whole kernal corn cut the kernals off the cob with a knife or a corn cutter.  My oldest daughter prefers just to use a knife.

For cream corn you will need a corn cutter with a shredding attachment.  We did whole kernal.  We prefer to hot pack our vegetables.  You have less jar breakage when you drop the jar into hot water.

Put all of the cut kernals into a pot and water enough so that it comes to the top of the corn and just a little over it.  Put the pot on the stove over high heat and bring the corn to a boil. 


Using a slotted spoon fill your jars to within an inch of headspace then add the cooking liquid to the top of the kernals.  Add 1 tsp salt for quarts and 1/2 tsp salt for pints.  Use canning salt or plain salt.  Do not use the iodized table salt.
After you have all of your jars filled then wipe the rims with a clean cloth (this is a very important step) and place sterilized lids and rings on them.
Then put them in the pressure canner and process at 10 lbs of pressure.  85 minutes for quarts and 60 minutes for pints.  These times are for my altitude in Arkansas.  You may have to adjust the time for your altitude.
After they are done with the time, remove the canner from the heat and allow to cool.Remove the jars and place them on a towel.  Do not let the jars touch.  If you are using Tattler lids then this is the time to final tighten the ring


Let the jars sit until they are totally cold, then remove the rings and check for completion of the seal.

You have just made corn with no preservatives or additives.  Also if you grew your own corn then you know that the corn itself was not treated.

Thursday, June 7, 2012

Canning Italian Zuchinni

***Note*** The USDA does not reccomend canning squash of any kind, I have been canning zuchinni for decades and no one has ever gotten sick. I am giving you this information on my own personal experience.  I am not telling you to do it nor am I telling you not to.  With the information you can make your own choice.  It MUST be pressure canned as it is a very low acid food...  In the 80's a lot of political mumbo-jumbo happened with the USDA and they took out their reccomendations for squash, pumpkin etc.  I use the book "Putting Food By" which was published in 1973.  This was the book that my grandmother and mother swore by when canning.  Because it was published prior to the lobbyists getting involved it still has the reccomendations.  I say this to show: In the mid 80's Libbys came out witheir pumpkin pie mix in a can.  All you have to do is add the eggs and milk.  That is the same thing as Pumpkin Butter.  I make my pumpkin butter and it can be used in the same way to make a pie.  The very same year that the new product was released the USDA decided it was not safe anymore to home can pumpkin or pumpkin Butter.  Coincidence????  I think not....
Zuchinni is a summer squash and does not store well like a winter squash does, nor does it freeze well since it just gets all mushy.  Canning is the best way that I have found to store it for the long term.  Unless you are just grating it and freezing it to put into bread or cake.  Mushy does not matter then.....

Italian Zuchinni

You will need a 5 gallon pot to do this and a long handled spoon

4 gallons of sliced Zuchinni-Do not peel only cut off the stem and flower ends, slice about 1/2" thick.
4 large onions peeled and quartered
1/4 cup minced Garlic (my family all loves garlic)
1/8 cup italian seasoning (or to taste) remember it WILL get stronger as it cans
Water to the top of the squash and onions in pot.

                                                        add your seasonings


                             Cook on the stove until the Zuchinni is just soft enough to bend.


                                         Fill your jars leaving about one inch of head space


 Wipe rims of jars off with a clean towel and then place the lids on


 Process in a pressure cooker for 40 minutes at 10 lbs of pressure (for my altitude in Arkansas)


When you want to cook this for dinner it is wonderful made this way:

2 jars of Zuchinni drained well.  Place them in a baking dish, add some melted butter and sprinkle with parmesean cheese.  Bake at 350 degrees until the cheese is melted.


Friday, June 1, 2012

Sweet pickle relish

Sweet Pickle Relish


I hate giving the store money for things like pickles when they are so easy to make.  For the last 2 years my cucumbers had not done well.  This year they are putting on like crazy.  We use a lot of relish in this house so making some is definately in order.  This was the first batch for the year.  We will need about 36 pints of relish to last the year just for our house. 

This recipe originally came from a web site called heritage recipes and then I tweeked it to my taste.  This is going to be very similiar to store bought pickle relish.

run all these veges thru a grinder with the blade that has the largest holes

10lbs cucumbers (do not peel but do cut the big ones in half and remove the big seeds)
2 green bell peppers
1 large red bell pepper
1 large or 2 small onions

Put 2 qts of water in a large pot and 1 cup of canning salt , bring this mixture to a boil.  Then add the ground veges to the pot.  Cover and let sit for about 2 hours

After soaking then drain the mixture the best that you can by ladling it into a strainer and allow the juice to drip out
Put the mixture back into the pot and add the following:
1 tsp mustard seed
1 tsp celery seed
1 tsp tumeric
2 cups apple cider vinegar
5 cups sugar
1 TBS corn starch

Stir well and heat to boiling.  Allow the mixture to boil for 30 minutes while stirring freqently to avoid scorching.
After boiling once again drain the relish or use a slotted spoon to fill the jars leaving 1 inch of head space.

Wipe the rims of the jars and place clean sterilized lids on them with rings
The process in a boiling water bath for 15 minutes
Remove the jars and tighten the rings if you are using tattler lids.  Allow to cool without disturbing them.

Enjoy the relish and also enjoy not giving your money to the big grocery store corporations.....


Saturday, May 19, 2012

Bambi Burger

My oldest daughter who is now 28 started calling ground venison "Bambi Burger" when she was small... She was about 5 or so.  Yesterday I made Bambi burger.  Venison has very little fat and in order to have a good tasting ground meat you need a little.  I buy the cheapest hamburger I can and then I mix it about 50/50, that gives you about a mix of 87/13 which is going to be real close to ground chuck. 

How to:
Start out with boneless venison that has had all of the facia (shiny white coverings on the muscles), fat (it is gamey tasting), and tendons (the stringy, tough, white things) removed.  Cut it into small enough strips so that it fits into your grinder easily.  I use a grinder attachment for my KitchenAide so I cut them into about 1 inch strips.  first I run it thru with a course blade (it has the bigger holes).  Then I runb it thru with the fine blade.

  As I run it thru with the fine blade I also run the hamburger thru at the same time. I take handfulls of hamburger and put it into the bowl of course ground venison and then get a piece of hamburger and a piece of the venison about the same size.

When you are all done your burger should look like this:
freeze it in 1 qt zipper bags or make into patties and then freeze.  You can make your patties and place them on a wax paper lined cookie sheet.

Put the whole sheet in the freezer.  After they are frozen then take the patties off the tray and put them in a big bag.  Then you can take out how ever many you need for dinner and cook them the same as you would the store bought frozen patties.  The ground venison you can use the same as you would any other ground meat.

Wednesday, May 9, 2012

Company has shown up for dinner.. Unexpectedly.. A meal for 11 all from food storage and in 15 minutes

Company just showed up in this case it was my daughter and her two children plus my son-in-laws brother and 2 nephews.  That made 11 counting us.  I did not have anything thawed out for a meal so I went to the food storage and this is what I came up with:
Chipped beef with gravy over noodles and corn

Chipped Beef over noodles
4 jars of home-canned beef
8 packets brown gravy mix
a handfull of dehydrated onions

Put the beef into a pot and the water for the gravy mix (1 cup for each package), the gravy mix and the dried onions whisk until smooth.  Turn on medium heat and heat until boiling and the gravy thickens.

Boil egg noodles and drain when they are done

Serve the beef and gravy over the noodles

Corn

3 cans of corn
Butter (optional)
Sugar
Salt to taste

Drain corn, add 1 stick of butter, 3 tablespoons sugar and salt to taste.  Heat

This entire meal took 15 minutes to make and came entirely from my food storage.  Everyone was telling me "wow this is good"  Then I told them it came entirely from the food storage and they could not believe it.  I made the entire meal in 15 minutes that is why I call this "convenience food", nothing came out of the fridge and everything came out of my food storage.  I had eleven very happy tummies and leftovers for the next day.  Just because it is in your food storage does not mean that it should be difficult to prepare or bad tasting.

Store what you eat and eat what you store.


Thursday, April 26, 2012

Culturing Buttermilk and Sour cream-Kitchen Microbiology


Have you ever tried to make something and it called for buttermilk?  Of course there is the old standby of adding vinegar or lemon juice to regular milk and letting it clabber.  That just isn’t as good as that nice thick stuff they sell at the store, nor is it any good for the late night southern treat of buttermilk poured over cornbread, crackers or biscuits.  Then of course in many areas of our country stores do not even sell buttermilk or it is very hard to find.  The south it is pretty common but in the north? Many recipes call for buttermilk: Pancakes, biscuits, cornbread, etc.


Once you have started your buttermilk it is as easy as keeping a batch going in your fridge indefinitely.  Just make sure you save 12 oz of the cultured buttermilk to add to 32 ounces of fresh milk for the next batch.  My first culture was bought over a year ago and I still have fresh buttermilk in the fridge.


Here in Northwest Arkansas a quart of Buttermilk at Wal-Mart is $1.57, which would equal $6.28 a gallon and a gallon of regular milk is $2.  If you have a cow then the price would be that much better!  So we can get over the sticker shock of $6.28 a gallon by making it ourselves for the cost of a gallon of regular milk.


Different kinds of Buttermilk:


Old Fashioned Buttermilk:

This is the left over fluid from when you make butter, hence the term “Buttermilk”.  It will have small chunks of butter in a tart whitish fluid.  As you churn your butter it creates a lump of butter.  Once it is drained and dried what is left is old fashioned buttermilk.


Cultured Buttermilk (store bought Buttermilk):

This is made with a culture of Streptococcus Lactis.  The fresh milk is the growing medium for these beneficial bacteria. You will need to inoculate your fresh milk (medium) with cultured buttermilk (bacterial start) and allow it to grow at room temperature. 


Definitions to help explain:


Bacteria:  is a micro-organism.  We all know about the nasty ones that make us sick.  There are however good ones that do a job for us.  We have all heard that streptococcus causes strep throat.  No fears the term Streptococcus means that it is a type of bacteria that resembles little balls (cocci) under a microscope and is in the strep family.  The last word Lactis is what determines the strain of streptococcus it is.  Strep throat is caused by “Group A Beta Hemolytic Streptococcus” (GAS), see the difference in the name?  And there is a huge difference in the type of bacteria.  So don’t worry you won’t catch “strep throat” from this.


Medium: This is whatever you put the bacteria in to grow.  In a lab it would be a Petri dish with some kind of gelled medium like chicken broth.  In our kitchen lab it is fresh milk, it can be raw or pasteurized (store bought)


Inoculate:  This is to introduce a starting batch of bacteria into your growing medium.


How to make Buttermilk:


First you will have to buy 1 pint or quart of buttermilk at the store in order to get your bacterial start.  If you keep it going then it will be the last time you have to buy it.


You will need fresh milk (regular whole milk tastes best) and a glass jar with a lid.  I like ½ gallon or 1 gallon jars.


Measure 12 ounces of buttermilk and pour into the jar.  Then if you have a ½ gallon jar fill it to the top with fresh (sweet) milk.  If you are using a gallon jar than measure 2 quarts of milk.  Add to the jar with your starting culture.  You are inoculating your fresh milk with the culture at this time.


Screw the lid on tightly and shake it up.  Now leave it sitting on your counter either over night or all day. It should clabber in 12-16 hours.  As the bacteria multiply and grow, you will start to notice the milk beginning to clabber.  Usually it is separated more but my hubby got into it last night and shook it up for his cornbread and buttermilk snack.


When you shake the jar it will coat the inside with a smooth white coating.  That is when it is done.  See how it coats the side of the glass.

Place the jar in the fridge at this time.  If you notice the buttermilk separating and looking curdled it is fine just shake it up.


How to make Sour Cream:


Sour cream is made the same way except using heavy cream instead of milk.  You would combine 4 oz of buttermilk to 12 ounces of heavy cream.  Leave it sitting on the counter.  Instead of clabbering and separating it will get thick.   When it is ready you will not be able to shake it but instead will have to stir it.  I like it creamy like in the picture below.

Recipes:


Ranch dip:

 12 ounces sour cream

1/2 tablespoon garlic powder

1/2 teaspoon dried oregano

1/2 teaspoon dried dill weed

1/2 tablespoon dried chives

1/2 tablespoon dried parsley

1 tablespoons grated Parmesan cheese

1/2 tablespoon Worcestershire sauce

1/2 teaspoon ground white pepper


Mix together and enjoy


Cornbread with buttermilk:

This is a light and fluffy corn bread that is a favorite in my family


1 cup cornmeal

1 cup flour

2 tsp baking powder

1/8 cup sugar

1 tsp salt

½ tsp baking soda

¼ cup melted bacon grease or oil

1 ½ cups buttermilk

2 eggs


Spray 9x9 pan with cooking spray.  Mix all ingredients together and pour into pan.  Bake at 450 until golden brown and the edges pull away from the pan.


Variations:

Bacon cornbread: crumble a couple slices of crisp bacon into the batter


Mexican Cornbread:  Add chopped onions, whole kernel corn and chopped peppers to taste


Muffins: Pour into muffin tins instead of a pan


Onion Cheese:  Add ½ cup shredded cheddar cheese and 3 chopped green onions


Southern Midnight snack:  break up cornbread into a cup and cover with buttermilk.  Enjoy!!